20.3 企业网站的实现
Yii框架使用命令行创建项目是非常快捷的。下面来讲述如何通过Yii框架快速实现企业网站。
20.3.1 使用Yii框架的沙箱模式建立项目
使用Yii框架的沙箱模式建立项目的方式非常简单。
01 下载框架文件并且把它放在Web根目录的项目文件夹下。然后使用命令行执行yiic命令来创建项目。本例中使用的命令行如下:
C:\wamp\www\goodone> ..\..\bin\php\php5.3.8\php framework\yiic.php webapp goodone
02 在goodone项目文件夹下,使用wampserver中bin\php\php5.3.8\php来执行Yii框架下framework中的yiic.php创建一个webapp,其名称为goodone。
这时goodone根目录的文件夹下的情况如图20-5所示。
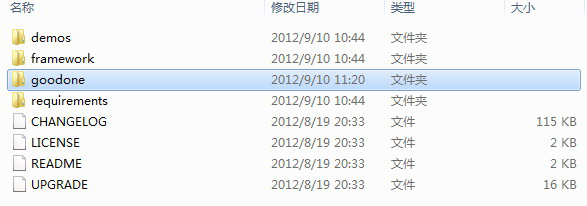
图20-5 goodone根目录的文件夹下的情况
而goodone文件夹下的情况如图20-6所示。

图20-6 goodone文件下的情况
至此项目框架创建完毕。
03 配置apache中的virtualhost来创建本地域名。在wampserver下的httpd-vhosts.conf写入以下代码。
    <VirtualHost 127.0.0.1>
      ServerName goodone
      DocumentRoot 'C:/wamp/www/goodone/goodone'
  </VirtualHost>
然后在Windows的host文件中添加以下语句。
127.0.0.1 goodone
在修改host文件时,要关闭本地杀毒软件的实时防护。
04 最后要重启apache。此时,在浏览器中输入goodone,会出现以下页面,如图20-7所示。
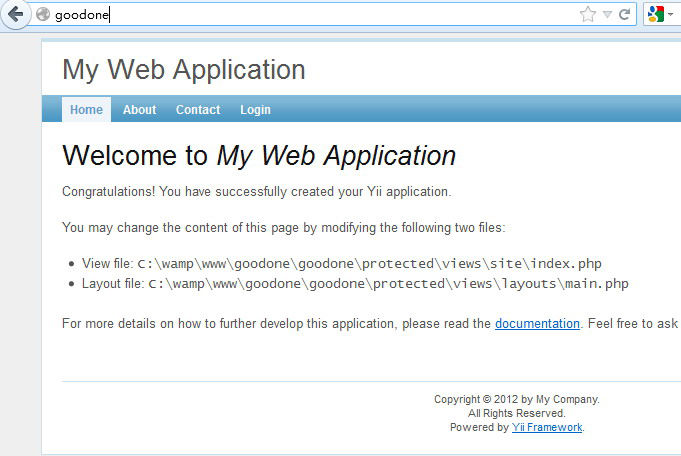
图20-7 goodone文件下的情况
至此,goodone项目已经建立。
20.3.2 开始goodone项目编程
Yii是一个优秀的框架,可以通过ORM方式很快地搭建网络应用,也可以通过PDO方式使用数据库查询语句来提高效率。并且同样使用其MVC的方式构建应用。为了使项目更贴近于PHP原初的编程样式,将采用PDO方式获得数据,使用MVC方式构建应用。
01 修改在C:\wamp\www\goodone\goodone\protected\config中的main.php文件来定义项目名称和连接MySQL数据库。
  <?php
  ……
  // CWebApplication properties can be configured here.
  return array(
  	'basePath'=>dirname(__FILE__).DIRECTORY_SEPARATOR.'..',
  	'name'=>'Good one website',
  ……
02 修改name为Good one website。
03 去除MySQL连接数组前面的“//”,从而激活此语句。
  'db'=>array(
  			'connectionString' => 'mysql:host=localhost;dbname=goodone',
  			'emulatePrepare' => true,
  			'username' => 'root',
  			'password' => 'xxxxxx',
  			'charset' => 'utf8',
  		),
04 将原先设计好的包含HTML、CSS和JavaScript的模板替换到Yii框架下的view的部分中。
<?php /* @var $this Controller */ ?> <!DOCTYPE html PUBLIC "-//W3C//DTD XHTML 1.0 Transitional//EN" "http://www.w3.org/TR/xhtml1/ DTD/xhtml1-transitional.dtd"> <html xmlns="http://www.w3.org/2099/xhtml" xml:lang="en" lang="en"> <head> <meta http-equiv="Content-Type" content="text/html; charset=utf-8" /> <meta name="language" content="en" /> <!-- blueprint CSS framework --> <link rel="stylesheet" type="text/css" href="<?php echo Yii::app()->request->baseUrl; ?>/css/screen.css" media="screen, projection" /> <link rel="stylesheet" type="text/css" href="<?php echo Yii::app()->request->baseUrl; ?>/css/print.css" media="print" /> <!--[if lt IE 8]> <link rel="stylesheet" type="text/css" href="<?php echo Yii::app()->request->baseUrl; ?>/css/ie.css" media="screen, projection" /> <![endif]--> <link rel="stylesheet" type="text/css" href="<?php echo Yii::app()->request->baseUrl; ?>/css/reset.css" /> <link rel="stylesheet" type="text/css" href="<?php echo Yii::app()->request->baseUrl; ?>/css/ layout.css" /> <link rel="stylesheet" type="text/css" href="<?php echo Yii::app()->request->baseUrl; ?>/css/form.css" /> <!--[if lte IE 9]> <script type="text/javascript" src="js/html5.js"></script> <![endif]--> <title><?php echo CHtml::encode($this->pageTitle); ?></title> </head> <body> <!--header begin--> <header class="header"> <section class="header-main"> <div class="logo fn-left"> <a href="#" title="logo"><img src="images/logo.png" width="370" height="116"></a> </div> <article class="welcome w01 fn-right"> <p>你好<br/><span>欢迎您来到 </span>“好个酒店”</p> </article> </section> </header> <!--header end--> <!--nav begin--> <section class="nav"> <nav class="fn-left"> <a href="index.php?r=site/index" title="HOME" class="n01 curr">首页</a> <a href="index.php?r=site/page&view=about" title="ABOUT" class="n02">概况</a> <a href="index.php?r=site/page&view=equipement" title="EQUIPMENT" class="n03">设施 </a> <a href="index.php?r=site/page&view=service" title="SERVICE" class="n04">服务</a> <a href="index.php?r=site/contact" title="CONTACT" class="n05">联系方式</a> </nav> <div class="search fn-right"> <label> <input type="text" class="input"/> </label> <input name="" type="button" class="btn"> </div> </section> <!--nav end--> <!--content begin--> <section class="content"> <?php echo $content; ?> <!--content left--> </section> <!--footer begin--> <footer class="footer fn-clear"> <div class="link fn-clear"> © 2012 Good + One, LLC <a href="http://www.goodones.co" title="www.goodones.co">www.goodones.co</a> <a href="mailto:info@goodones.co" title="info@goodones.co">info@goodones.co</a> </div> </footer> <!--footer end--> </body> </html>
05 修改后页面的预览效果如图20-8所示。
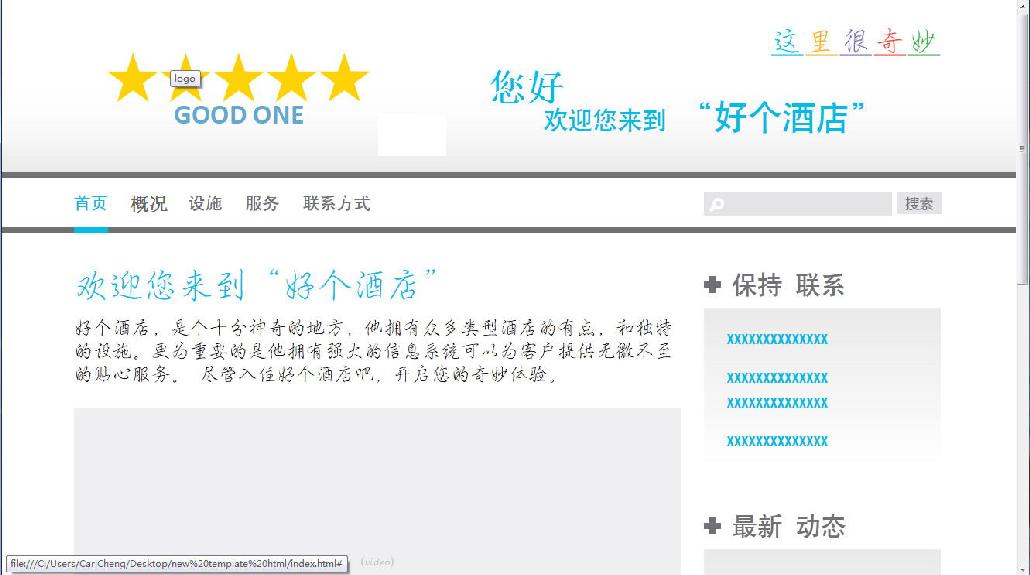
图20-8 页面预览效果
06 对下面代码进行分析。
  <link rel="stylesheet" type="text/css" href="<?php echo Yii::app()->request->baseUrl; ?>/css/screen.css"
media="screen, projection" />
  	<link rel="stylesheet" type="text/css" href="<?php echo Yii::app()->request->baseUrl; ?>/css/print.css"
media="print" />
  	<!--[if lt IE 8]>
  	<link rel="stylesheet" type="text/css" href="<?php echo Yii::app()->request->baseUrl; ?>/css/ie.css"
media="screen, projection" />
  	<![endif]-->
  	<link rel="stylesheet" type="text/css" href="<?php echo Yii::app()->request->baseUrl; ?>/css/reset.css"
/>
          <link rel="stylesheet" type="text/css" href="<?php echo Yii::app()->request->baseUrl; ?>/css/
layout.css" />
  	<link rel="stylesheet" type="text/css" href="<?php echo Yii::app()->request->baseUrl; ?>/css/form.css"
/>
          <!--[if lte IE 9]>
          <script type="text/javascript" src="js/html5.js"></script>
          <![endif]-->
  	<title><?php echo CHtml::encode($this->pageTitle); ?></title>
其中的Yii::app()->request->baseUrl,使用了yii的基本参数。css/reset.css和css/layout.css为相对应的css。
07 Reset.css中相应的文件存放在goodone\font的文件夹下。
  @font-face {
    font-family: 'Hanyihei';
    src: url("../font/hanyihei.ttf") format("truetype");
    font-style: normal; }
  @font-face {
    font-family: 'Minijanxixingkai';
    src: url("../font/minijanxixingkai.ttf") format("truetype");
    font-style: normal; }
08 分析下面的代码。
  <a href="index.php?r=site/index" title="HOME" class="n01 curr">首页</a>
  <a href="index.php?r=site/page&view=about" title="ABOUT" class="n02">关于我们</a>
  <a href="index.php?r=site/page&view=equipement" title="EQUIPMENT" class="n03">设施</a>
  <a href="index.php?r=site/page&view=service" title="SERVICE" class="n04">服务</a>
  <a href="index.php?r=site/contact" title="CONTACT" class="n05">联系方式</a>
其中,index.php?r=site/index,index.php?r=site/page&view=about等定义了菜单的链接内容。
20.3.3 构建message系统
通过Gii来实现message系统的CRUD的操作。
01 在config文件夹的main.php中设置如下代码。
  'modules'=>array(
  		// uncomment the following to enable the Gii tool

  		'gii'=>array(
  			'class'=>'system.gii.GiiModule',
  			'password'=>'123456',
  			// If removed, Gii defaults to localhost only. Edit carefully to taste.
  			'ipFilters'=>array('127.0.0.1','::1'),
  		),

  	),
这样Gii便可以使用了。
02 在浏览器地址栏中输入“http://goodone/index.php?r=gii”,再输入相应密码,便可以进入gii操作界面,生成message系统的Model、Controller和Crud操作。生成Model页面的效果如图20-9所示。
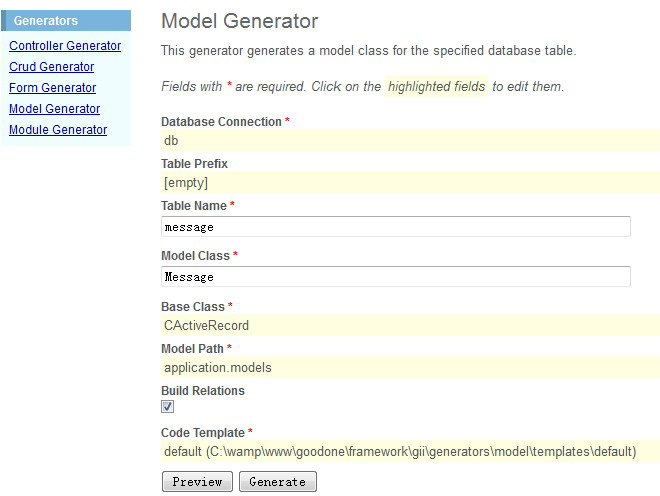
图20-9 生成的Model
03 生成的Crud页面的效果如图20-10所示。
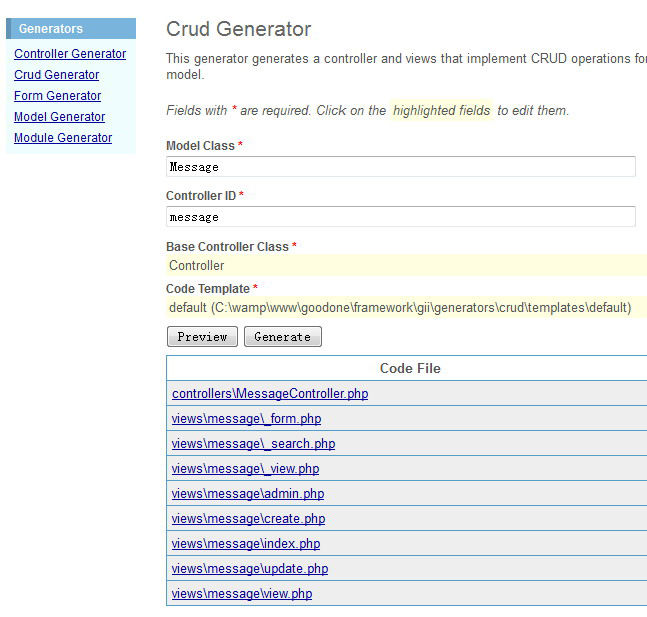
图20-10 生成的Crud
04 生成Controller页面的效果如图20-11所示。
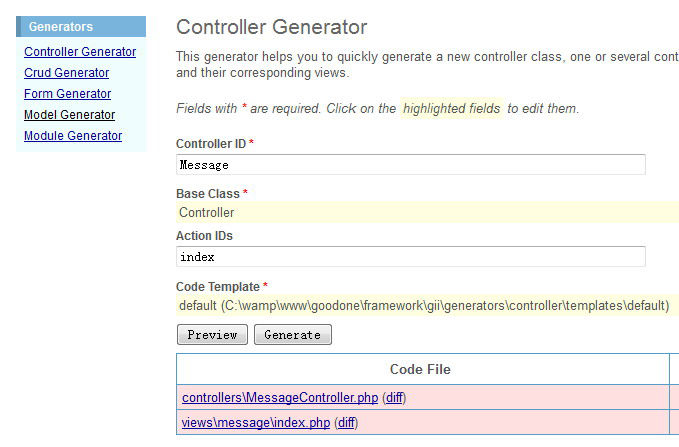
图20-11 生成的Controller
05 在浏览器中输入http://goodone/index.php?r=message,得到的页面如图20-12所示。
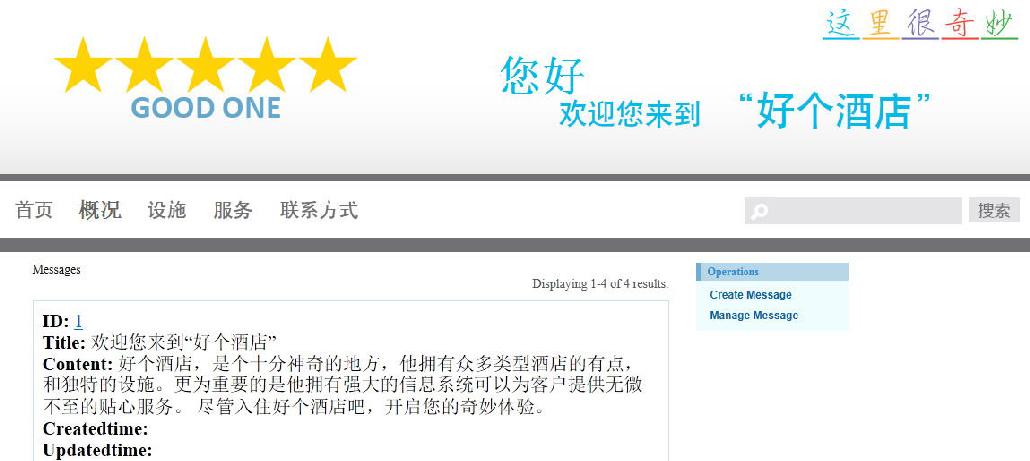
图20-12 页面预览效果
06 在这里,可以通过admin用户对message系统进行Crud操作。通过manage message连接可以操作message,如图20-13所示。
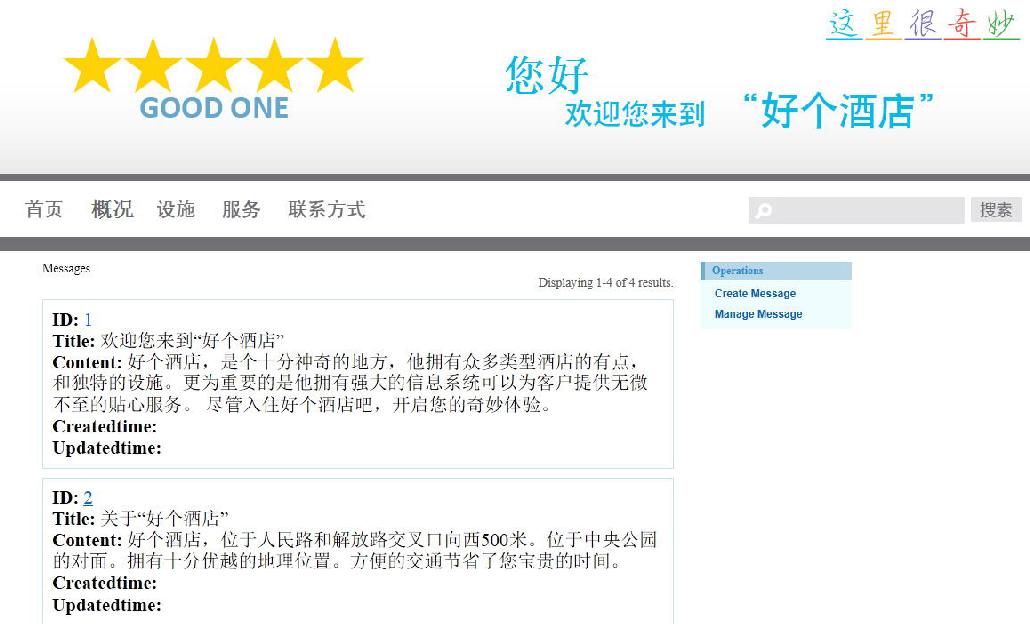
图20-13 页面message效果
07 将所添加的message记录显示在相应的位置。在首页所对应的views\site\index.php页面中修改代码如下:
     <?php
  /* @var $this SiteController */
  $message=Message::model()->findByPk(1);
  $this->pageTitle=Yii::app()->name;
  ?>
  <article class="content-left">
              <h1 class="w01"><?php echo $message->getAttribute('title');?></h1>
              <section class="about">
              <?php echo $message->getAttribute('content');?>
              </section>
  ……
其中,$message=Message::model()->findByPk(1);得到数据库中的第一条记录。<?php echo $message->getAttribute('title');?>得到此记录中title的内容。<?php echo $message->getAttribute('content');?>得到此记录中content的内容。
08 修改代码后的显示效果如图20-14所示。
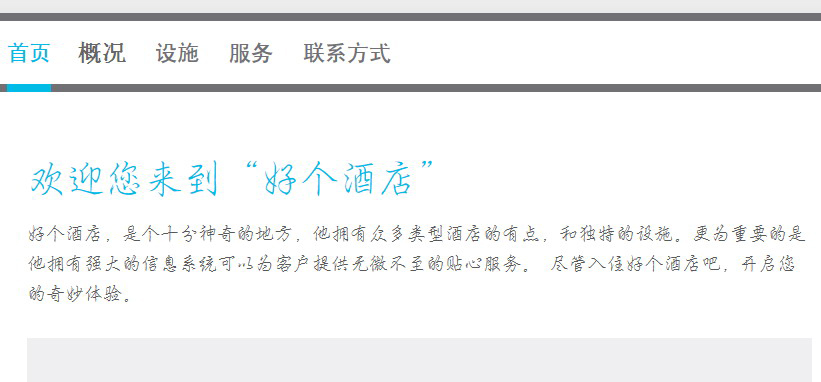
图20-14 修改后的页面显示效果
09 相对应的“概况”页面也是通过这种方式把待定的message记录显示在对应的位置。在views\site\pages\about.php页面中,添加代码如下。
    <?php
  /* @var $this SiteController */
  $message=Message::model()->findByPk(2);
  $this->pageTitle=Yii::app()->name . ' - About';
  $this->breadcrumbs=array(
  	'About',
  );
  ?>
  <article class="content-left">
              <h1 class="w01"><?php echo $message->getAttribute('title');?></h1>
              <section class="about">
              <?php echo $message->getAttribute('content');?>
              </section>
               <aside class="general" id="wrap-QAList">
                  <h2 class="general-title">热门问题</h2>
                  <ul>
                      <li><p>QUESTION?</p><span>Answer.</span>
                      <li><p>QUESTION?</p><span>Answer.</span>
                      <li><p>QUESTION?</p><span>Answer.</span>
                      <li><p>QUESTION?</p><span>Answer.</span>
                      <li><p>QUESTION?</p><span>Answer.</span>
                      <li><p>QUESTION?</p><span>Answer.</span>
                      <li><p>QUESTION?</p><span>Answer.</span>
                  </ul>
              </aside>
          </article>
          <!--content right-->
          <article class="content-right">
              <h2>保持 <span>联系</span></h2>
              <aside class="content-right-con connected">
                  <p>xxxxxxxxxxxxxx</p>
                  <p>xxxxxxxxxxxxxx<br>
                       xxxxxxxxxxxxxx</p>
                  <p>xxxxxxxxxxxxxx</p>
              </aside>
              <h2>最新 <span>动态</span></h2>
              <aside class="content-right-con posts">
                  <p><a href="#" title="title">xxxxxxxxxxxxxx</a></p>
                  <p><a href="#" title="title">xxxxxxxxxxxxxxx</a></p>
                  <p><a href="#" title="title">xxxxxxxxxxxxxxxx</a></p>
              </aside>
          </article>
          <p class="clb"></p>
其中,$message=Message::model()->findByPk(2);得到数据库中的第二条记录。<?php echo $message->getAttribute('title');?>得到此记录中title的内容。<?php echo $message->getAttribute ('content');?>得到此记录中content的内容。
10 修改代码后的显示效果结果如图20-15所示。
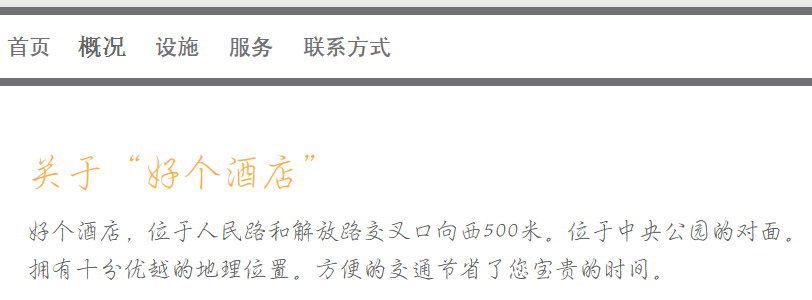
图20-15 修改后的页面显示效果
11 同理,在views\site\pages文件夹下,再创建equipment.php和service.php文件。添加代码如下。
在equipment.php中添加代码如下:
  <?php
  /* @var $this SiteController */
  $message=Message::model()->findByPk(3);
  $this->pageTitle=Yii::app()->name . ' - About';
  $this->breadcrumbs=array(
  	'About',
  );
  ?>
  <article class="content-left">
              <h1 class="w03"><?php echo $message->getAttribute('title');?></h1>
              <section class="general">
              <?php echo $message->getAttribute('content');?>
              </section>
               <aside class="general" id="wrap-QAList">
                  <h2 class="general-title">热门问题</h2>
                  <ul>
                      <li><p>QUESTION?</p><span>Answer.</span>
                      ……
                      <li><p>QUESTION?</p><span>Answer.</span>
                  </ul>
              </aside>
          </article>
          <!--content right-->
          ……
          <p class="clb"></p>
12 修改代码后的现实效果如图20-16所示。
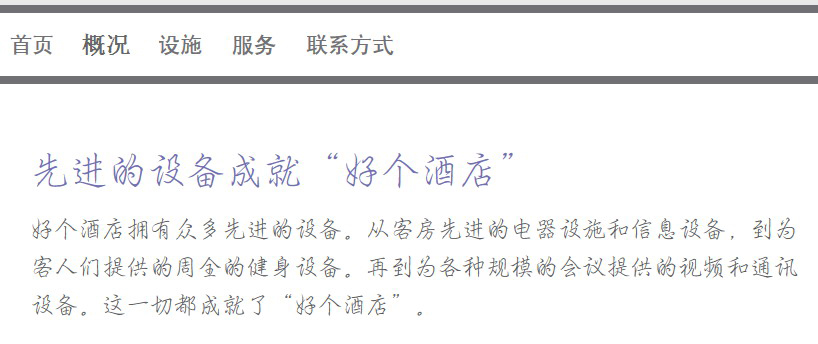
图20-16 修改后的页面显示效果
13 在service.php中添加代码如下。
  <?php
  /* @var $this SiteController */
  $message=Message::model()->findByPk(4);
  $this->pageTitle=Yii::app()->name . ' - About';
  $this->breadcrumbs=array(
  	'About',
  );
  ?>
  <article class="content-left">
              <h1 class="w04"><?php echo $message->getAttribute('title');?></h1>
              <section class="general">
              <?php echo $message->getAttribute('content');?>
              </section>
               <aside class="general" id="wrap-QAList">
                  <h2 class="general-title">热门问题</h2>
                  <ul>
                      <li><p>QUESTION?</p><span>Answer.</span>
                      ……
                      <li><p>QUESTION?</p><span>Answer.</span>
                  </ul>
              </aside>
          </article>
          <!--content right-->
          ……
          <p class="clb"></p>
14 修改代码后的现实效果如图20-17所示。
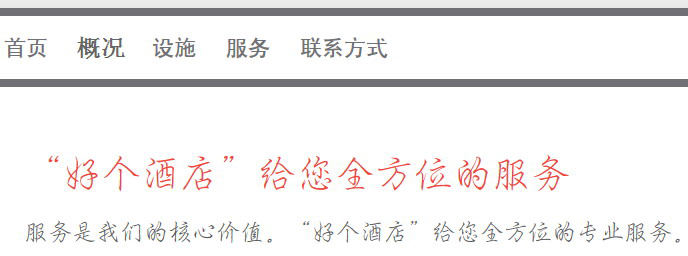
图20-17 修改后的页面显示效果
15 这些记录都是通过http://goodone/index.php?r=message来到message系统的管理页面进行添加和管理的,如图20-18所示。
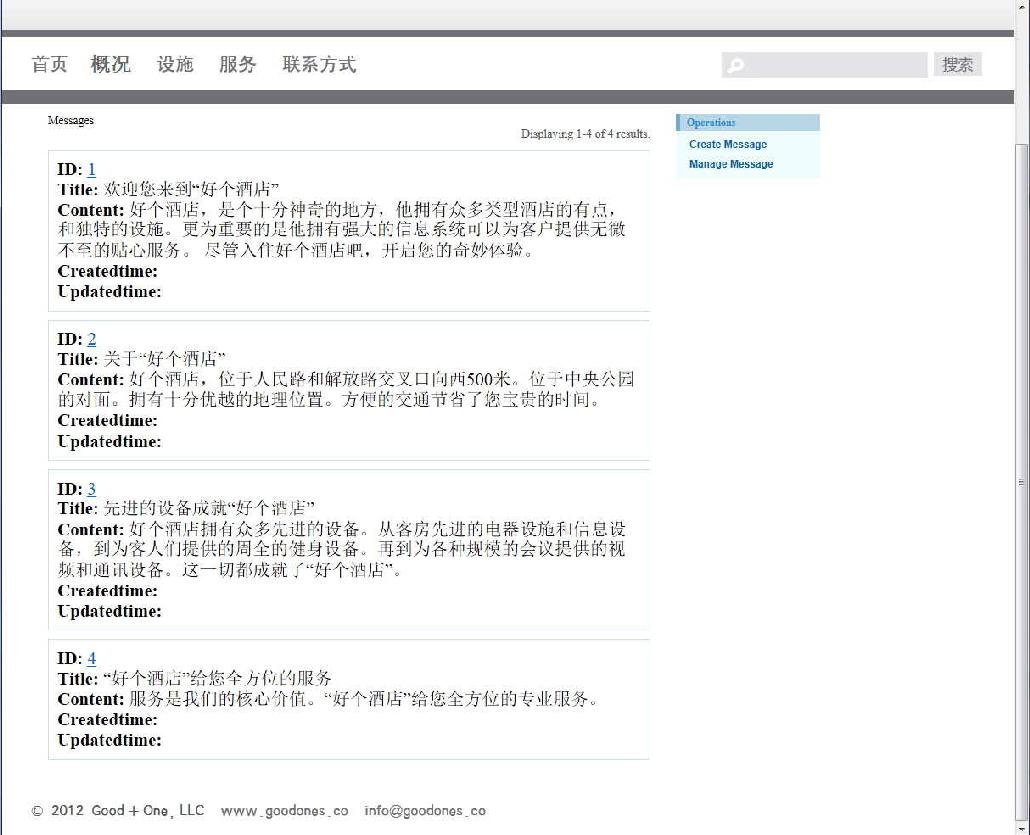
图20-18 message系统的管理页面
20.3.4 构建product系统
使用相同于message系统的方法构建product系统。通过Gii来实现product系统的Crud的操作。
生成以下文件:
models\Product.php
controllers\ProductController.php
views\product\_form.php
views\product\_search.php
views\product\_view.php
views\product\admin.php
views\product\create.php
views\product\index.php
views\product\update.php
views\product\view.php
在浏览器中输入“http://goodone/index.php?r=product”并按【Enter】键确认,进入product系统的管理页面,如图20-19所示。
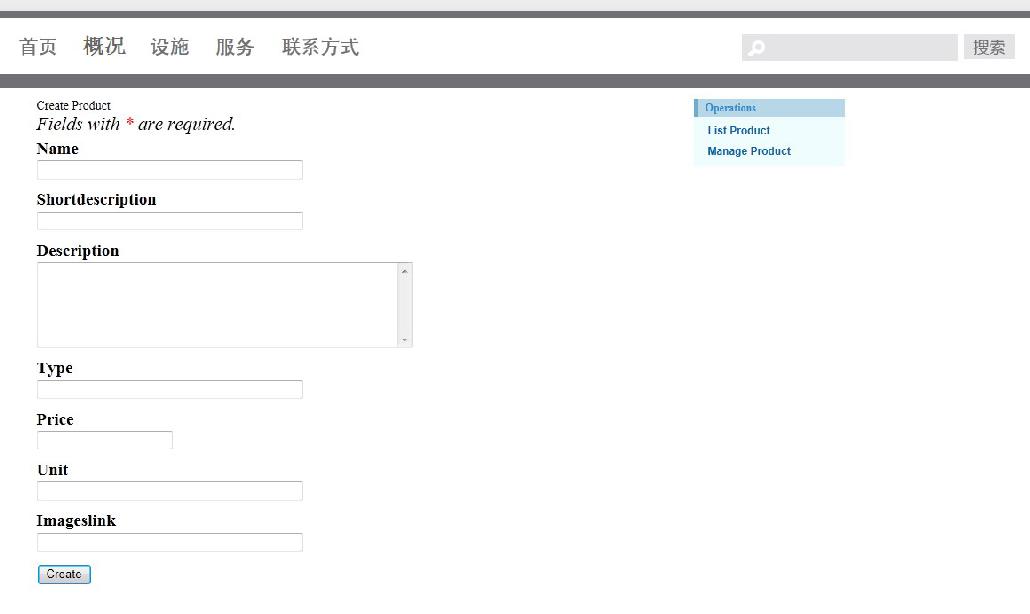
图20-19 product系统的管理页面
在这里添加product记录,如图20-20所示。
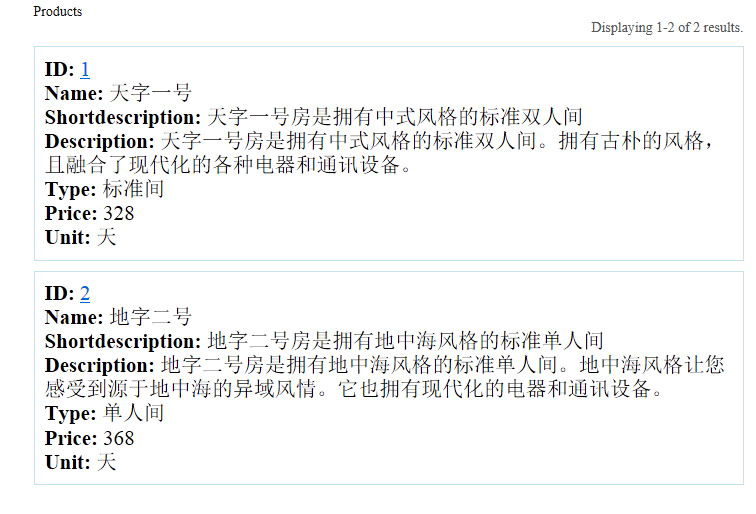
图20-20 添加product记录
在首页展示product项目。修改site\index.php文件的代码如下。
  <?php
  /* @var $this SiteController */
  $dataProvider=new CActiveDataProvider('Product');
  $message=Message::model()->findByPk(1);
  $this->pageTitle=Yii::app()->name;
  ?>
  <article class="content-left">
              <h1 class="w01"><?php echo $message->getAttribute('title');?></h1>
              <section class="about">
              <?php echo $message->getAttribute('content');?>
              </section>
              <section >
                  <?php
                  $this->widget('zii.widgets.CListView', array(
                      'dataProvider'=>$dataProvider,
                      'itemView'=>'_productview',
                  ));
                  ?>
              </section>
  ……
其中,$dataProvider=new CActiveDataProvider('Product');获得product的记录。
  <?php
     $this->widget('zii.widgets.CListView', array(
         'dataProvider'=>$dataProvider,
         'itemView'=>'_productview',
     ));
     ?>
使用Yii的list控件来显示前台数据。'itemView'=>'_productview'定义了显示单条数据的模板。所以要在文件夹views\site下,建立一个模板文件_productview.php,并且输入以下代码。
  <?php
  /* @var $this ProductController */
  /* @var $data Product */
  ?>
  <div class="view">
  	<?php echo CHtml::link(CHtml::encode($data->name), 'index.php?r=product/view&id='.$data->id); ?>
  	<br />
  	<?php echo CHtml::encode($data->shortdescription); ?>
  	<br />
  	<?php echo CHtml::encode($data->type); ?>
  	<br />
  	<b><?php echo CHtml::encode($data->getAttributeLabel('price')); ?>:</b>
  	<?php echo CHtml::encode($data->price); ?> / <?php echo CHtml::encode($data->unit); ?>
  	<br />
  	<?php /*
  	<?php echo CHtml::encode($data->imageslink); ?>
  	<br />
  	*/ ?>
  </div>
其中,<?php echo CHtml::link( CHtml::encode($data->name), 'index.php? r=product/view&id = '.$data->id); ?>给出了以标题为内容的链接。<?php echo CHtml::encode($data-> shortdescription); ?>给出了简介内容。$data->type,$data->price,$data->unit分别给出了类型、价格和单位。但是它们都需要Yii的CHtml::encode()函数来转义为html对象。
修改代码后的最终效果如图20-21所示。
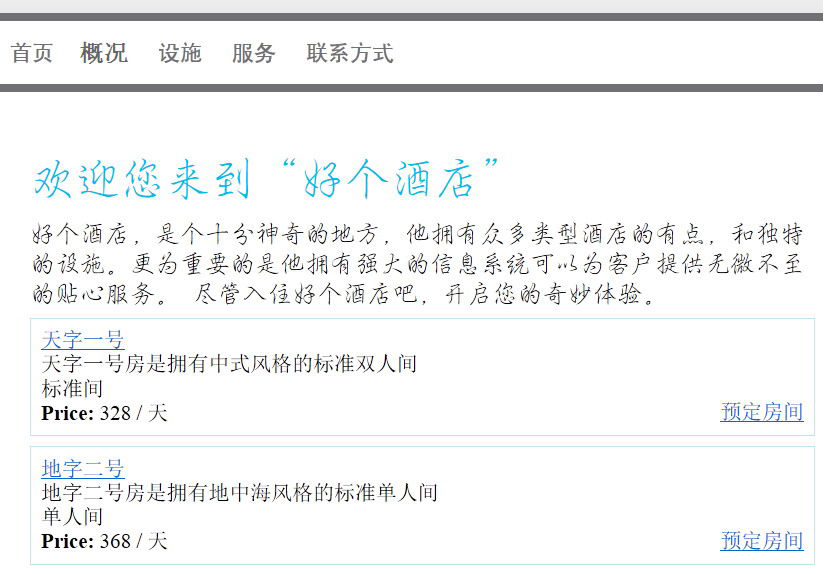
图20-21 修改后的页面显示效果
20.3.5 构建order系统
使用相同于message系统的方法构建order系统。通过Gii来实现order系统的Crud的操作。
生成页面如下:
models\Order.php
controllers\OrderController.php
views\order\_form.php
views\order\_search.php
views\order\_view.php
views\order\admin.php
views\order\create.php
views\order\index.php
views\order\update.php
views\order\view.php
在浏览器中输入“http://goodone/index.php?r=order ”,按【Enter】键确认,进入order系统的管理页面。创建order记录的管理界面如图20-22所示。
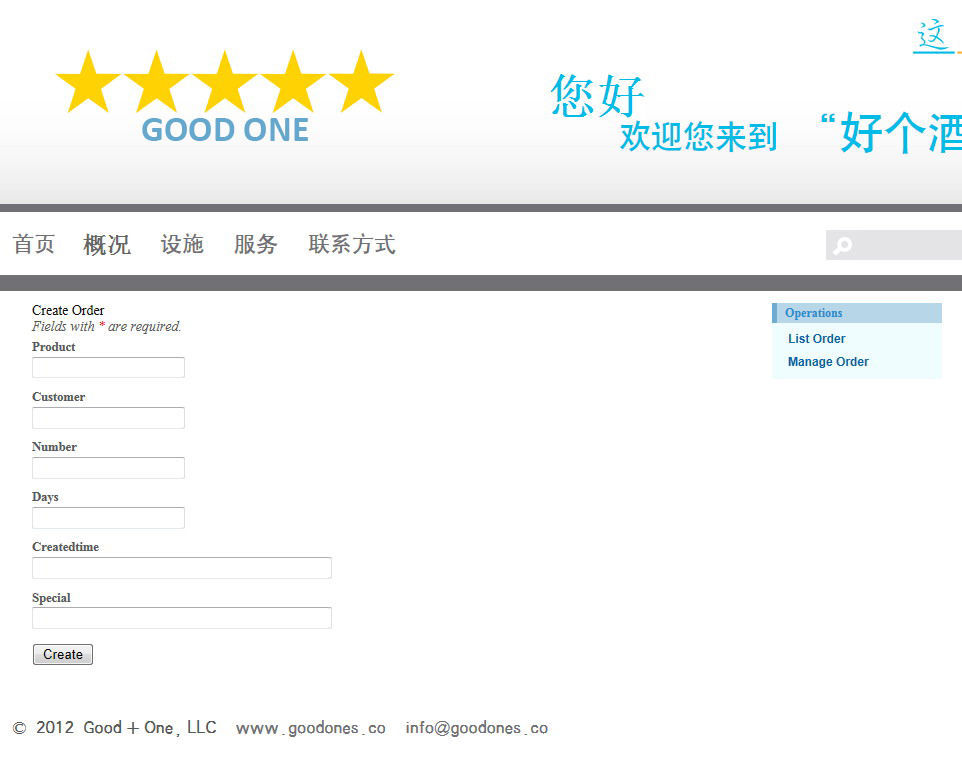
图20-22 order系统的管理页面
但是,在实际的使用中,用户是不能这样下订单来预订房间的。所以就需要引入form来处理预订房间的功能。但是在下订单之前,客户一定要先填写个人信息,来确认身份。这就需要先构建customer系统。
20.3.6 构建customer系统和order系统建立订单
使用相同于message系统的方法构建customer系统。通过Gii来实现customer系统的Crud的操作。
生成页面如下:
models\Customer.php
controllers\CustomerController.php
views\customer\_form.php
views\customer\_search.php
views\customer\_view.php
views\customer\admin.php
views\customer\create.php
views\customer\index.php
views\customer\update.php
views\customer\view.php
首先,按照用户的体验过程,需要在首页建立预订房间的链接。编辑views\site\_productview. php文件,在其尾部添加代码如下:
<p id="link"><?php echo CHtml::link('预订房间', array('/customer/createbyuser','productID'=> $data-> id)); ?></p>
并且在css\layout.css文件中添加如下代码:
  p#link{
          float:right;
      }
修改完代码后,刷新首页,效果如图20-23所示。
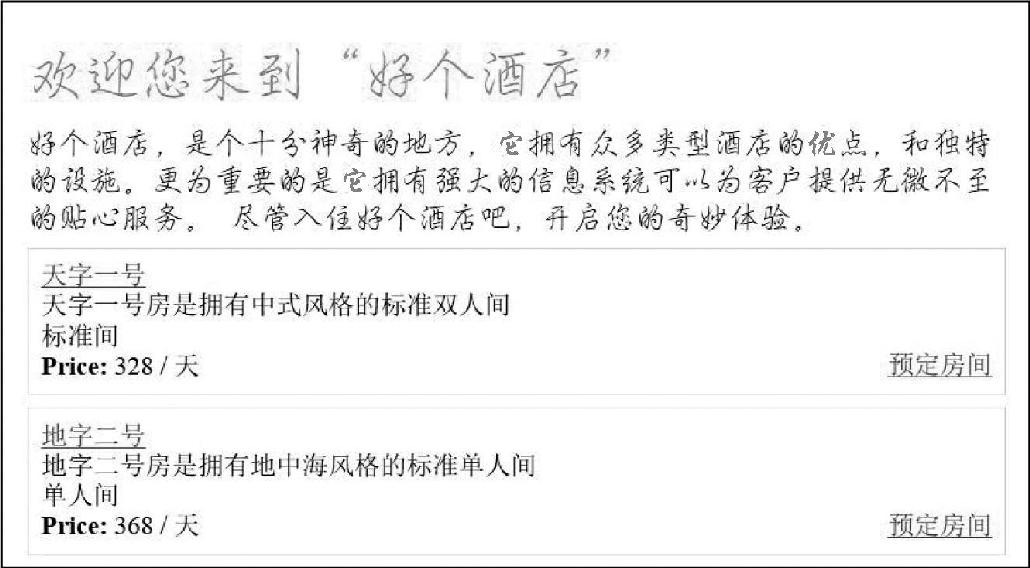
图20-23 修改后的页面显示效果
单击“预订房间”超链接后,首先让客户填写基本信息。所以应该让客户来到用户创建页面。
首页中“预订房间”的代码<?php echo CHtml::link('预订房间',array('/customer/createbyuser', 'productID'=>$data->id)); ?>中,定义了连接的目标和需要传递的参数。目标为customer Controller下的create Action。传递的参数为productID,其值来源于$ data对象中的id属性。
修改controllers文件夹下的CustomerController.php文件,添加actionCreatebyuser()函数。
  	……
  public function actionCreatebyuser()
  	{
  		$model=new Customer;
  		// Uncomment the following line if AJAX validation is needed
  		// $this->performAjaxValidation($model);
  		if(isset($_POST['Customer']))
  		{
  			$model->attributes=$_POST['Customer'];
  			if($model->save())
  			$this->redirect(array('order/create','customerID'=>$model->id,'productID'=>Yii::app()->
request->getParam('productID')));
  		}
  		$this->render('createbyuser',array(
  			'model'=>$model,
  		));
  	} ……
并且修改CustomerController.php文件中的accessRules()函数如下。
  ……
  public function accessRules()
  	{
  		return array(
  			array('allow',  // allow all users to perform 'index' , 'view' and 'createbyuser' actions
  				'actions'=>array('index','view','createbyuser'),
  				'users'=>array('*'),
  			),
  			……
  			array('deny',  // deny all users
  				'users'=>array('*'),
  			),
  		);
  	}
  ……
$this->redirect(array('order/create','customerID'=>$model->id,'productID'=>Yii::app()->request->getParam('productID')));定义了customer createbyuser Action执行完毕以后,form重定向到新的目标和传递新的参数。$this->render('createbyuser',array('model'=> $model,));定义了此action所使用的模板文件为'createbyuser',并传递model对象。
另外,accessRules()函数中定义了新的action函数createbyuser()的访问权限。这里为所有用户可以访问。
在views\customer文件夹下添加createbyuser.php文件,添加代码如下:
  <?php
  /* @var $this CustomerController */
  /* @var $model Customer */
  $this->breadcrumbs=array(
  	'Customers'=>array('index'),
  	'Createbyuser',
  );
  ?>
  <h1>Create Customer</h1>
  <?php echo $this->renderPartial('_form_create', array('model'=>$model)); ?>
在此文件夹下添加_form_create.php文件,并且添加以下代码:
  <?php
  /* @var $this CustomerController */
  /* @var $model Customer */
  /* @var $form CActiveForm */
  ?>
  <div class="form">
  <?php $form=$this->beginWidget('CActiveForm', array(
  	'id'=>'customer-form',
  	'enableAjaxValidation'=>false,
  )); ?>
  	<p class="note">Fields with <span class="required">*</span> are required.</p>
  	<?php echo $form->errorSummary($model); ?>
  	<div class="row">
  		<?php echo $form->labelEx($model,'name'); ?>
  		<?php echo $form->textField($model,'name',array('size'=>45,'maxlength'=>45)); ?>
  		<?php echo $form->error($model,'name'); ?>
  	</div>
  	<div class="row">
  		<?php echo $form->labelEx($model,'gender'); ?>
  		<?php echo $form->textField($model,'gender',array('size'=>6,'maxlength'=>6)); ?>
  		<?php echo $form->error($model,'gender'); ?>
  	</div>
  	<div class="row">
  		<?php echo $form->labelEx($model,'phone'); ?>
  		<?php echo $form->textField($model,'phone',array('size'=>45,'maxlength'=>45)); ?>
  		<?php echo $form->error($model,'phone'); ?>
  	</div>
  	<div class="row">
  		<?php echo $form->labelEx($model,'email'); ?>
  		<?php echo $form->textField($model,'email',array('size'=>45,'maxlength'=>45)); ?>
  		<?php echo $form->error($model,'email'); ?>
  	</div>
  		<?php echo $form->hiddenField($model,'type',array('size'=>45,'maxlength'=>45,'value'=>'normal')); ?>
  	<div class="row buttons">
  		<?php echo CHtml::submitButton($model->isNewRecord ? 'Create' : 'Save'); ?>
  	</div>
  <?php $this->endWidget(); ?>
  </div><!-- form -->
其中,createbyuser.php文件定义了索引和进一步要使用的局部模板_form_create.php文件。另外,_form_create.php文件使用Yii的CActiveForm构建了一个表单。
单击首页“预订房间”链接,效果如图20-24所示。
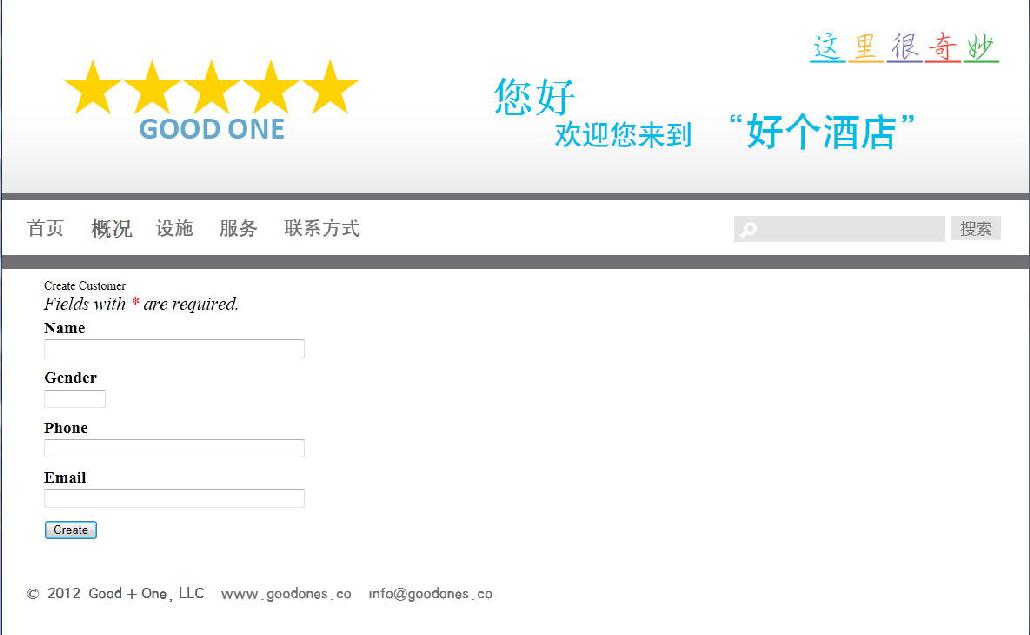
图20-24 修改后的页面显示效果
当用户完成基本信息录入之后,页面需要进入到订单信息录入的表单,并且需要传递用户的一些信息到订单信息录入的表单。
CustomerController.php文件中的actionCreatebyuser()函数中$this->redirect(array('order/ create','customerID'=>$model->id,'productID'=>Yii::app()->request->getParam('productID')));定义了重定向的目标为“order” Controller中的“create”Action。
所以用户要修改controllers文件夹下的OrderController.php文件中的actionCreate()函数,具体代码修改如下:
       	public function actionCreate()
  	{
  		$model=new Order;
  		// Uncomment the following line if AJAX validation is needed
  		// $this->performAjaxValidation($model);
  		if(isset($_POST['Order']))
  		{
  			$model->attributes=$_POST['Order'];
  			if($model->save())
  				$this->redirect(array('view','id'=>$model->id));
  		}
  		$this->render('create',array(
  			'model'=>$model,
                          'cid'=>Yii::app()->request->getParam('customerID'),
                          'pid'=>Yii::app()->request->getParam('productID'),
                      ));
  	}
'cid'=>Yii::app()->request->getParam('customerID'),'pid'=>Yii::app()->request-> getParam ('productID'),定义了要传递的参数。
由于一个房间订单的生成,离不开所对应的房间和所对应的客户,所以订单上需要的数据要有产品ID和客户ID的信息。而这些信息都需要传递给订单生成的表单,如图20-25所示。
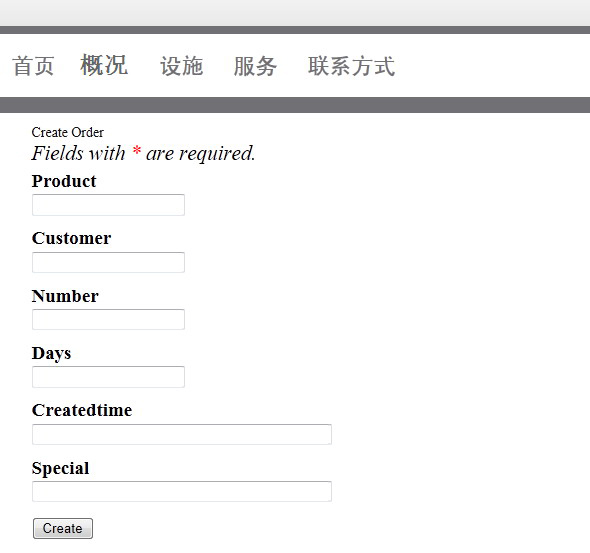
图20-25 生成订单的信息
现在参数已经传递,而订单生成的表单如何获得相应的数据呢?这就需要修改views\order下的create.php文件和_form.php文件。
修改的create.php如下:
  <?php
  /* @var $this OrderController */
  /* @var $model Order */
  $this->breadcrumbs=array(
  	'Orders'=>array('index'),
  	'Create',
  );
  ?>
  <h1>Create Order</h1>
  <?php echo $this->renderPartial('_form', array('model'=>$model,'customerID'=>$cid,'productID'=>$pid)); ?>
修改的_form.php如下:
  <?php
  /* @var $this OrderController */
  /* @var $model Order */
  /* @var $form CActiveForm */
  ?>
  <div class="form">
  <?php $form=$this->beginWidget('CActiveForm', array(
  	'id'=>'order-form',
  	'enableAjaxValidation'=>false,
  )); ?>
  	<p class="note">Fields with <span class="required">*</span> are required.</p>
  	<?php echo $form->errorSummary($model); ?>
  	<div class="row">
  		<?php echo $form->labelEx($model,'product_id'); ?>
  		<?php echo $form->textField($model,'product_id',array('value'=>$productID)); ?>
  		<?php echo $form->error($model,'product_id'); ?>
  	</div>
  	<div class="row">
  		<?php echo $form->labelEx($model,'customer_id'); ?>
  		<?php echo $form->textField($model,'customer_id',array('value'=>$customerID)); ?>
  		<?php echo $form->error($model,'customer_id'); ?>
  	</div>
  	……
       <div class="row">
  		<?php echo $form->labelEx($model,'createdtime'); ?>
  <?php echo $form->textField($model,'createdtime',array('size'=>45,'maxlength'=>45,'value'=>time())); ?>
  		<?php echo $form->error($model,'createdtime'); ?>
  	</div>
  ……
  <?php $this->endWidget(); ?>
  </div><!-- form -->
<?php echo $form->textField($model,'product_id',array ('value'=>$productID)); ?>和<?php echo $form->textField($model,'customer_id',array('value'=>$customerID)); ?>将值赋予了相对应的表单元素。
<?php echo $form->textField($model,'createdtime',array('size'=>45,'maxlength'=>45, 'value'=> time())); ?>使用当前时间戳为createdtime赋值。
通过“预订房间”的操作,进入如图20-26所示的页面。
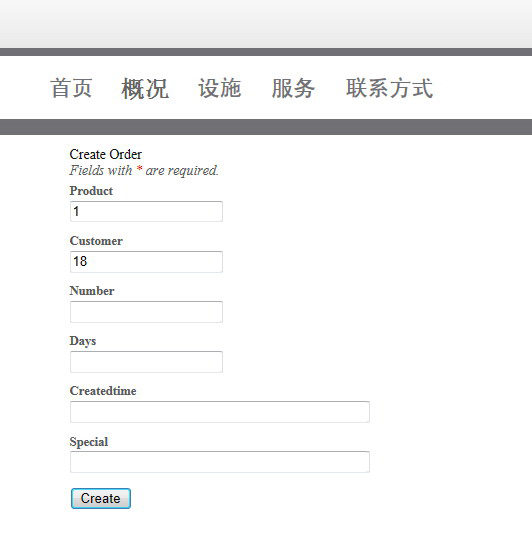
图20-26 生成订单的元素页面
可以看到,已经被给予product和customer元素的值。然后填入其余元素的值,订单就可以生成了。生成后的订单如图20-27所示。
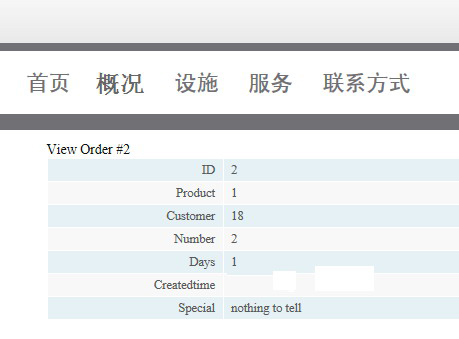
图20-27 生成订单的效果
这样订单系统就构建完成。剩下的工作,就可以优化信息的友好性。比如,将产品id转换为相对应的产品名称;把用户id转换为相对应的用户名;或者可以引入下拉列表框这样的页面控件增加友好性等。读者可以根据实际的需求进行修改相关的代码即可。